Seed Starting Exposé!! Part II Germination
In lieu of "Tool of the Week Sunday" here's Part II of the Seed Starting Exposé where we cover how to take a packet of seeds from in-the-packet to in-the-ground. In Part I we looked at storing and testing the seeds to ensure you even have a fighting chance to make it to sprouts. Today we'll cover how to make it from seed to germination. I'll show you two ways too. The first will be how you can/should do it at home and the second will be the method we are using here on the farm, the only real difference is scale, governing principals remain the same.
 |
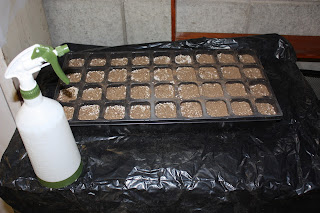
| Seed Starting Tray |
Task: Create the conditions required to germinate 1-2 seeds per cell in preparation for transplanting into soil or larger pots.
Those conditions are basically: soil to seed contact at the proper depth underneath the surface, consistent moisture levels, consistent temperature in the range required for that seeds germination (will be listed on the back of the seed packet, barring that most will germ between 70-80F).
Endstate: Achieve 50% or greater germination rate and begin preparations for hardening off (hardening off is the 'hard part' (get it? hard?) and is most likely the place you could potentially kill off the whole tray off, but we'll cover it in part III)
Step 1: Open up the package, the actual soil should be contained in a thin plastic film of cells that are sitting in the more rigid bottom tray. If this is not the case you're going to need to find a tray to put your cells into, one that won't drain. Pour some room temperature water into the tray (1/4 full) and put the sheet with the cells into it to begin soaking up the water from the bottom.
Step 2: Take your seed packet and look on the back for the 'suggested planting depth' (if you're using your Uncle Ebeneezer's heirloom seeds and have no packet, a good rule of thumb is plant the seeds at a depth 3x the seeds width). Using your knife, scratch two holes in each cell at the depth called for on the seed packet.
 |
| No more than 2 seeds per cell |
Step 4: Using the knife, scrape soil over the seeds filling the trench and firm the soil on the surface of the cell with the butt of the knife remember one of the key ingredients for success is proper seed to soil contact. You want it firm but not packed down so water can't drain or the young roots can't drop.
Step 5: Move the tray to the sink or somewhere where you can spray your water bottle and mist the tray until each cell is thoroughly soaked.
Step 6: Take and cover the top of the tray with plastic wrap and move to the warm, temperature stable environment. Bonus points if the heat source is directly below the trays providing 'bottom heat.'
Step 7: Check on your tray at least once a day ensuring that the cells still exhibit signs some of moisture and aren't bone dry like in the picture above. If they are, re-mist them and check to make sure the plastic wrap is tight and keeping the moisture in the cells.
 |
| Wet |
| Dry |
Here are the 'economies of scale' tweaks to the 7 Step Method we use here at Serenity Valley Farm just to share with you how we do it here for 'small scale production.'
1. Instead of the plastic-wrapped seed starting tray we purchase flats of 'Jiffy Plugs' in bulk. These are compressed peat plugs that are made in a variety of widths depending on what type of seeds you are starting and how long you'll need to keep them in the plugs before transplanting. Larger plugs will allow you more time before the roots of the seedlings outgrow the plug and demand transplanting. These flats of plugs, which are disposable, are placed into 10"x20" nursery flats (w/no drainage holes).
Each flat contains 75 cells and serves the same purpose as the seed starting tray. We use rigid clear plastic propagation domes with adjustable vent holes on the top to serve the same purpose as the plastic wrap. They provide better moisture retention and allow us to keep the trays in the germ chamber longer to get a better start on vegetative growth which increases their chances as they enter the hardening-off phase.
 |
| Prop. Domes |
Our Germination chamber is just a metal cargo bin with a piece of plywood on it with a vent hole cut in it and a 400W metal halide shop light above it. By manipulating the vent hole we can keep the temp between 80-85F.
| Germination Chamber |
 |
| Vent Hole |
 |
| Warm-N-Happy |
Orange Bell Peppers
Early Jalapenos
Ancho Giganta Peppers
Sweet Chocolate Peppers
Fingerling Eggplants
Italian Eggplants
Red Bell Peppers
Red Sweet Chili
Crimson Sprinter Slicing Tomato, a yellow slicing tomato that the neighbors gave us when we moved up here Riesentraube Cherry tomatoes
Greek Oregano
Common Thyme
Flat Leaf Parsley
Italian Curled Parsley
Rosemary
Catnip
Chives
Sage
It's about time to start thinking about starting some early cucumbers too. Y'all have a nice week and thanks for reading.


